
How to pack jewelry without tangling comes down to two things: controlling movement and separating pieces that like to cling to each other, especially fine chains and hoops.
If you have ever opened a bag to a fist-sized knot of necklaces, you already know the real cost is not just time, it is also scratched metal, bent clasps, and that one earring that disappears at the worst moment. Travel cases help, but you do not always need a fancy organizer to get a clean, wearable setup.
This guide focuses on practical, low-stress methods you can do with items you already own, plus a few small upgrades that usually pay for themselves if you travel more than once or twice a year. You will also get a quick checklist, a packing table, and a simple routine for unpacking and re-packing without chaos.
Why jewelry tangles in luggage (and why it gets worse on trips)
Tangles are not bad luck, they are physics plus travel habits. Chains are flexible, light, and happy to thread through anything that has a gap.
- Movement and vibration: rolling bags shake constantly, chains loop and tighten like a drawstring.
- Mixed materials: different chain thicknesses and pendant shapes snag each other, especially lobster clasps and extender chains.
- Too much empty space: when jewelry sits loose in a pouch that is larger than the pieces, everything swings and collides.
- Moisture and residue: lotion, sunscreen, and humidity add a bit of grip, which can make tiny knots “set” faster.
According to TSA, you can bring jewelry in carry-on or checked bags, but they recommend placing valuables in carry-on for security and loss prevention. That advice also helps with tangles because carry-ons usually get handled more gently than checked luggage.
Quick self-check: what kind of tangle risk do you have?
Before you pick a method, be honest about what you are packing. The “right” solution depends on whether you have two chains or a full rotation for outfits.
- High risk: delicate chains under 1 mm, layered necklace sets, pieces with extender chains, long pendant necklaces.
- Medium risk: bracelets with charms, hoop earrings, multiple rings that can scratch each other.
- Low risk: studs, single cuff bracelet, chunky chains that hold shape.
If you check at least two “high risk” items, you will usually want separation (straws, sleeves, or a case with channels) rather than a single pouch.
The best packing methods (choose what matches your trip)
There is no single perfect trick, but there are a few methods that consistently work when you apply them carefully. The goal stays the same: keep each chain from crossing another chain.
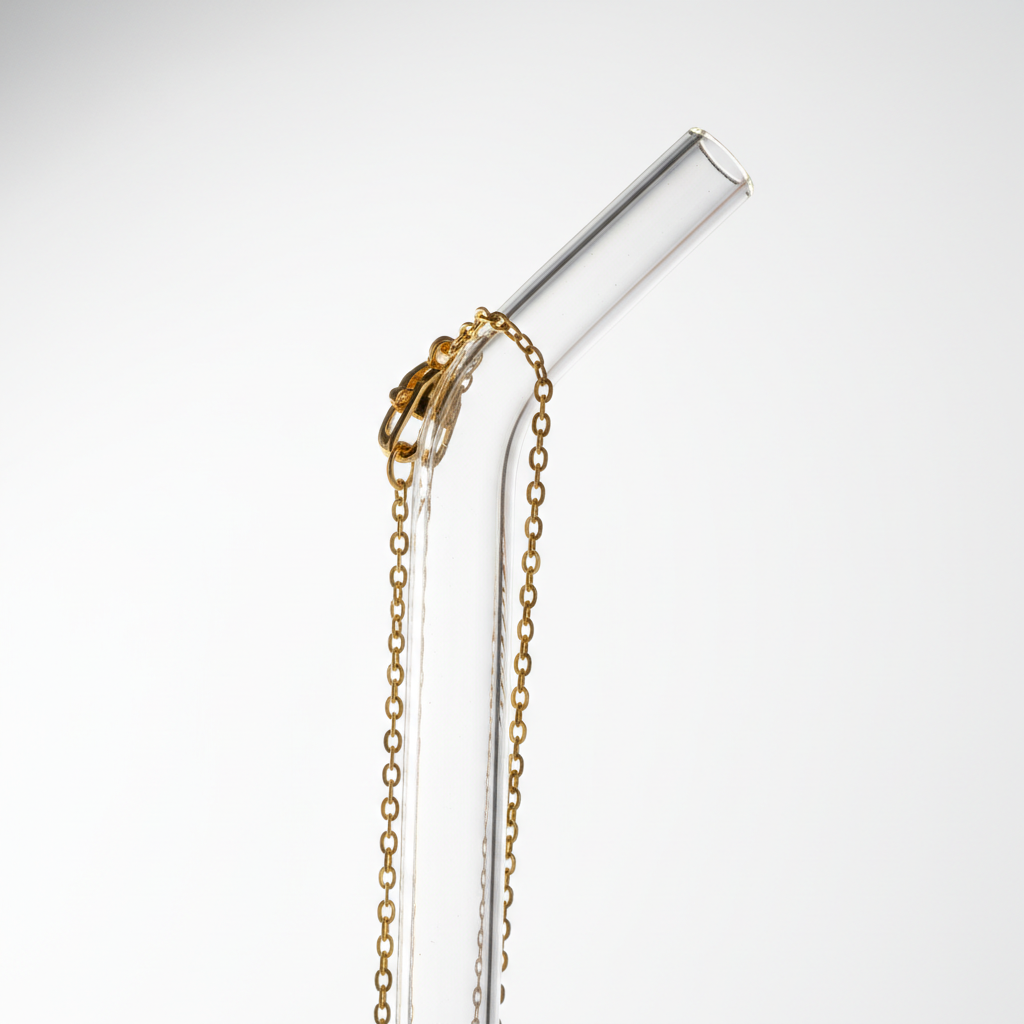
Method A: Straw or tube method (best for fine necklaces)
This is the most reliable low-cost option for thin chains. You are basically giving the chain a “spine” so it cannot knot.
- Cut a straw to roughly the chain length (reusable silicone straws work well).
- Unclasp the necklace, thread one end through the straw.
- Re-clasp the necklace so the chain stays inside the tube.
- Place each “straw necklace” in a small pouch or zip bag.
Small detail that matters: if the pendant is large, leave it outside the straw so it does not jam, then wrap the pendant in a soft cloth or tissue.
Method B: Press-and-seal or zip bag “flat pack” (best for short trips)
Lay the chain flat in a small bag, squeeze air out, and close it. Keep the clasp near the top edge so it is easy to grab later.
- One chain per bag, no exceptions for layered sets.
- Leave the pendant outside the seal if it creates a hard lump.
- Store all small bags inside one larger pouch to keep them together.
This method is easy, but bags can tear and the “flat” shape can curl if you pack tightly, so it is better for carry-on and shorter distances.
Method C: Pill organizer for earrings and tiny rings (best for pairs)
A weekly pill case is underrated. Each compartment becomes a dedicated space for a pair of studs, small hoops, or a ring.
- Put one pair per compartment, backing included.
- Add a small square of tissue to stop rattling if needed.
- Photograph your set before leaving so you can confirm nothing is missing on the way home.
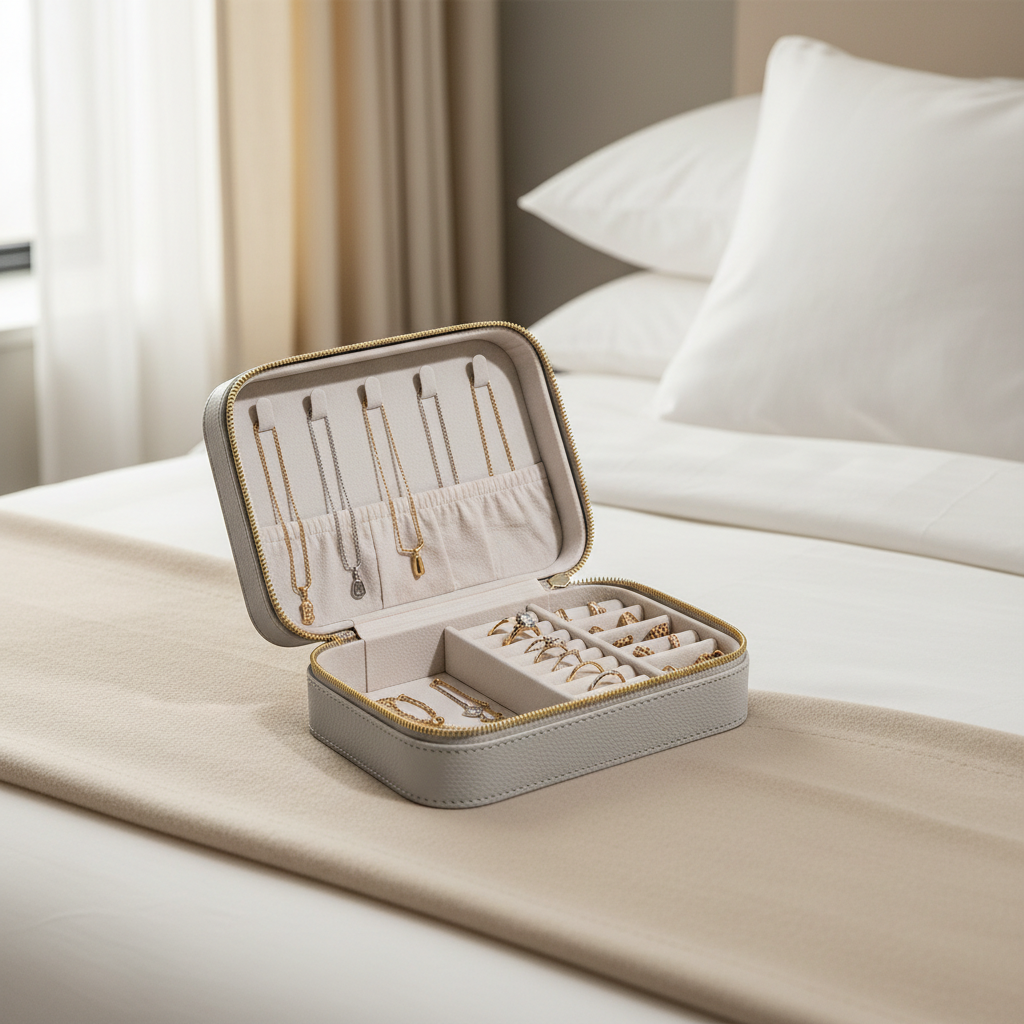
Method D: Jewelry roll or travel case (best for frequent travelers)
If you travel often, a good case can simplify everything because it enforces separation. Look for:
- Individual necklace hooks plus a fabric flap that covers them.
- Zippered compartments for rings and earrings.
- Structure: semi-rigid cases prevent crushing inside a tote.
Many cases still allow tangles if you overload the hooks, so keep it realistic: two to four necklaces per trip is a sweet spot for most people.
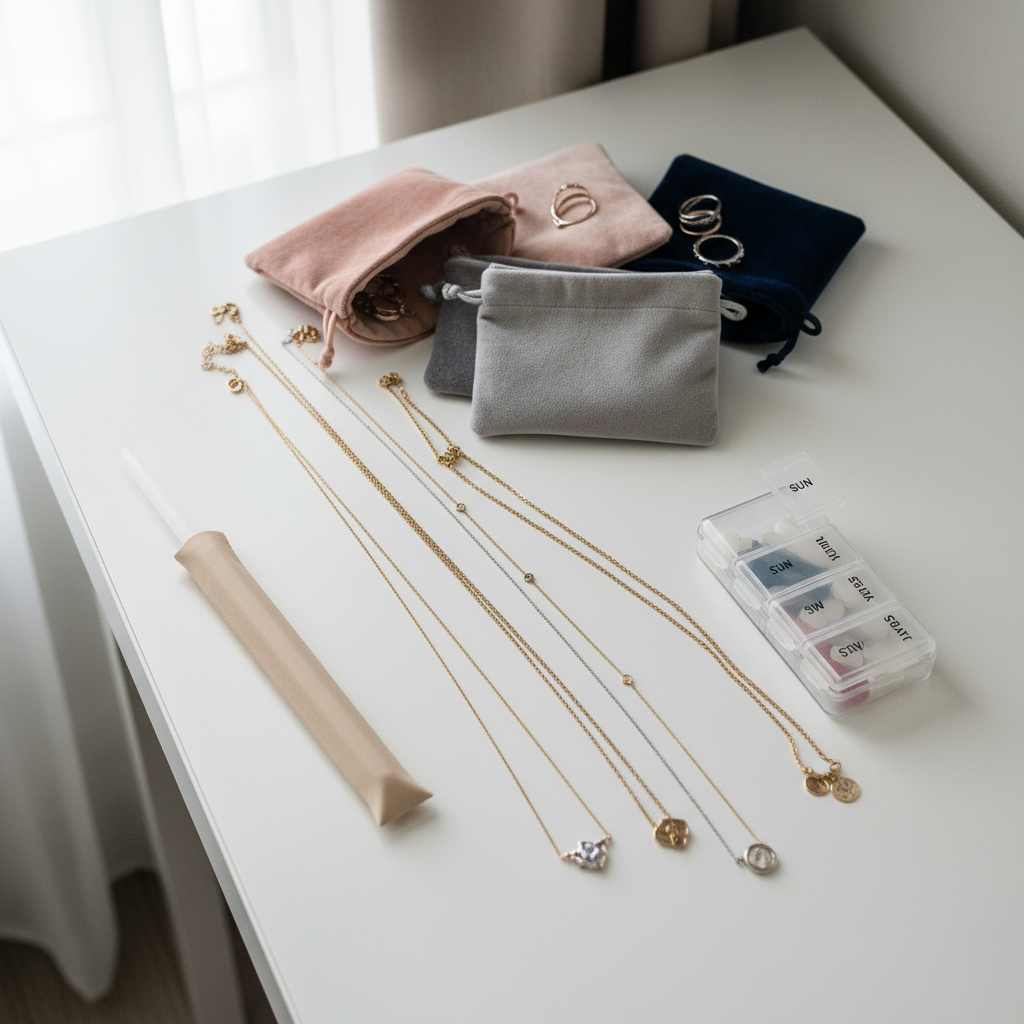
What to pack: a simple anti-tangle kit
You do not need a “jewelry packing kit” sold as a kit, you just need a few items that prevent motion and abrasion.
- 2–4 small pouches (soft, non-scratch material)
- Reusable straw or a few regular straws for fine chains
- Small zip bags for backup separation
- Pill organizer for earrings, rings, and spare backs
- Microfiber cloth for quick wipe-down before packing
According to the Gemological Institute of America (GIA), routine care includes storing jewelry separately to help prevent scratches. Travel is basically “storage under stress,” so separation matters more than people expect.
Packing table: match item type to the right method
If you only take one thing from this article, let it be this: match the method to the item, not to your mood the night before a flight.
| Jewelry type | Tangle/scratch risk | Best packing method | Extra tip |
|---|---|---|---|
| Fine chain necklace | High | Straw/tube + pouch | Keep pendant outside tube |
| Layered necklace set | High | Separate each chain (bags or tubes) | Avoid packing pre-layered |
| Chunky chain | Medium | Soft pouch or case compartment | Close clasp to avoid snag |
| Stud earrings | Low | Pill organizer | Include extra backs |
| Hoops | Medium | Individual compartment or pouch | Wrap to prevent bending |
| Rings | Medium | Ring slot or pill organizer | Separate stones from metal |
| Bracelets with charms | Medium-High | Zip bag flat pack | Fasten clasp before bagging |
Step-by-step: how to pack jewelry without tangling for a 3–7 day trip
This is the routine that tends to work for most travelers because it reduces decisions.
- Pick a small “capsule”: 1 everyday set, 1 dressier set, 1 wildcard piece. More than that often creates clutter.
- Wipe pieces fast: remove lotion residue so items do not stick together.
- Secure closures: close clasps on chains and bracelets so they cannot hook other items.
- Separate by type: necklaces get tubes or bags, earrings go in a pill organizer, rings in their own slot.
- Pack where movement is lowest: inside a carry-on, nestled between soft items, not against hard shoes or chargers.
Key point: if you mix necklaces and earrings in one pouch “just for one night,” that is usually where the knot happens. Convenience at packing time becomes friction at unpacking time.
Common mistakes that cause knots (even with a case)
People buy a travel organizer and still get tangles because of a few predictable habits.
- Overloading hooks: two necklaces per hook can work, five rarely does.
- Leaving extenders loose: extender chains behave like fishing line, tuck them into the same bag or tube.
- Packing jewelry dirty: sunscreen and hair product can make pieces cling, plus it is harder to clean later.
- Putting jewelry near magnets: magnetic clasps can grab each other through fabric, then everything twists.
- Throwing in “just one more”: extra pieces often end up loose, which defeats the system.
If you keep getting tangles, it is usually not the method, it is the moment you stop following it because you are rushing.
If jewelry arrives tangled: safe ways to undo knots
Sometimes travel wins. When it does, avoid yanking because that can bend links or weaken solder points.
- Find good light and lay the chain on a flat surface.
- Add a tiny bit of slip: a drop of baby oil can help, then clean the piece after.
- Use two pins: gently pick at the knot from the center outward.
- Take breaks: warm fingers and patience matter more than force.
For valuable pieces, heirlooms, or anything that feels delicate, it can be smarter to ask a jeweler for help rather than risk snapping a chain. Many shops will handle this quickly for a small fee, but pricing varies.
Conclusion: a simple system beats “careful packing” every time
How to pack jewelry without tangling is less about being careful and more about building a repeatable system: separate pieces, reduce movement, and keep closures from acting like hooks. Once you pick one method for necklaces and one method for small items, packing stops feeling like a puzzle.
Action steps: before your next trip, set aside a straw or two and a pill organizer, then do a quick test pack and shake your pouch for 10 seconds. If nothing crosses or twists, you are ready.
If you want a more hands-off routine, consider keeping a small travel-only jewelry kit pre-stocked so you do not rebuild the system each time you leave.