
How to make lipstick last all day usually comes down to two things people skip: prep that actually matches your lip type, and a layering routine that locks pigment in without turning your mouth into sandpaper.
If your color disappears after coffee, bleeds into fine lines, or breaks up in the center, it’s rarely because you “chose the wrong shade.” Most of the time it’s friction, moisture, and oil breaking the film that holds pigment in place.
Also, “long-wear” is not one category. A soft satin bullet, a matte bullet, a creamy gloss, and a liquid matte behave like different products. This guide helps you figure out what’s failing, then gives a few reliable routines you can repeat on busy days.
Why lipstick fades: the real culprits (and what to do about each)
Lipstick wears off because the lip surface is flexible, slightly damp, and constantly moving. Add food, drinks, and face oils, and most formulas start sliding.
- Dry flakes: pigment clings to rough patches, then breaks apart. Fix with gentle exfoliation and controlled hydration, not heavy balm right before color.
- Too much slip underneath: thick balm, glossy skincare, or rich foundation on the lip line can prevent adhesion. Fix by blotting and using a thin base.
- No “edge control”: without liner, color migrates into fine lines. Fix with a waxy liner or a thin layer of concealer around the border.
- One thick coat: it looks great at first, then smears. Fix by applying in thin layers and blotting between.
- Wrong finish for your day: oily lunches and lots of talking punish creamy formulas. Choose a formula that matches your schedule.
Key point: durability is less about piling product on, more about building a thin, even film that can flex without cracking.
Quick self-check: what kind of wear problem do you have?
Before you change products, get specific. The fix for “gone after lunch” is different from “bleeding at the corners.”
- Fades evenly (looks lighter but smooth): you likely need stronger pigment layering or a setting step.
- Breaks up in the center (inner rim disappears): you’re fighting moisture and friction, a stain or layered method helps.
- Bleeds/feathers (edges spread): you need liner, edge cleanup, and less emollient near the border.
- Cracks and flakes (matte looks harsh): you need better prep and thinner coats, or a different finish.
- Transfers everywhere (cups, masks): you need blotting, powder setting, or a true transfer-resistant formula.
Once you know the failure pattern, you can pick the lightest routine that fixes it. Most people overcorrect and end up uncomfortable.
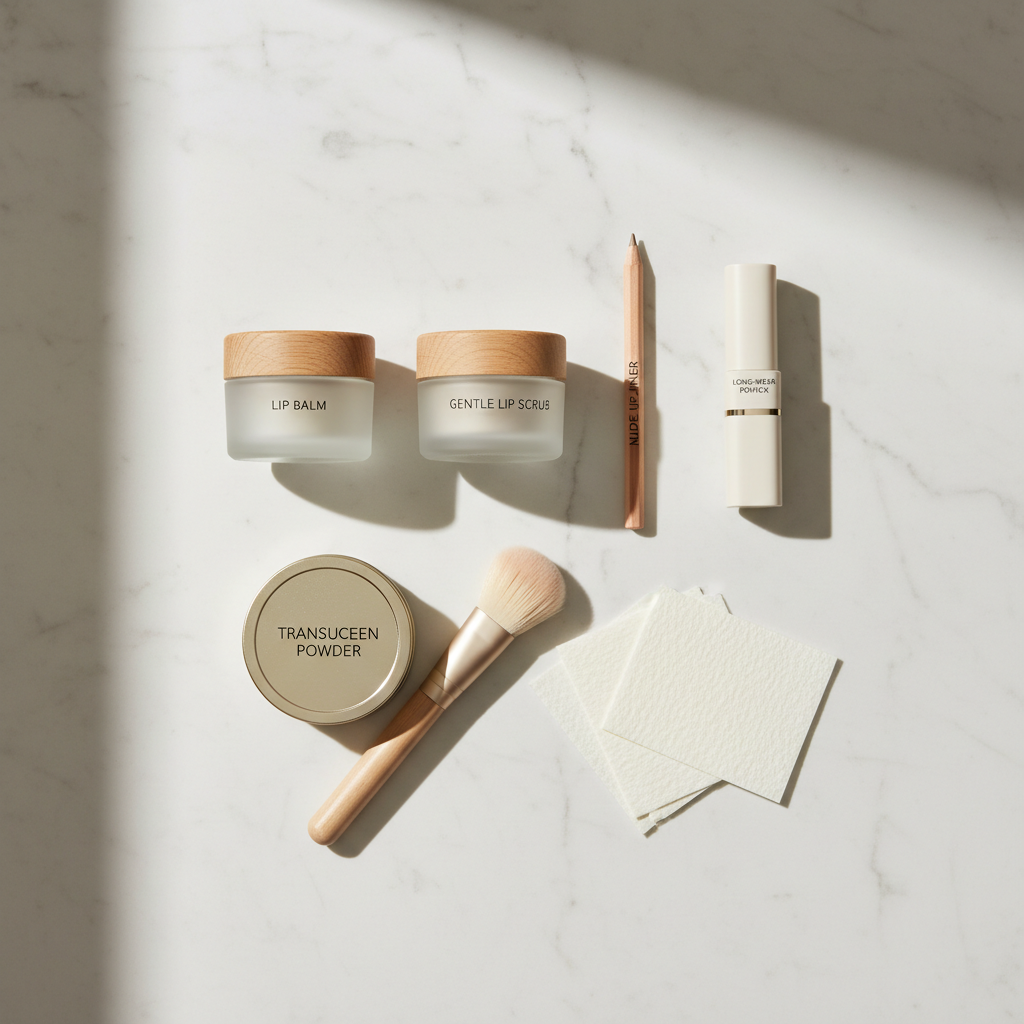
The “all-day” base routine: prep without overdoing it
How to make lipstick last all day starts before the lipstick. You want lips smooth and neutral, not slick.
Step 1: smooth the surface (30–60 seconds)
- If you have visible flakes, use a gentle lip scrub or a soft washcloth with warm water.
- Skip aggressive scrubs right before a bold matte, irritation can make edges look worse.
Step 2: hydrate, then remove the slip
- Apply a thin balm for 2–5 minutes while you do other makeup.
- Blot thoroughly with tissue before color so the lipstick grips.
Step 3: create a clean border
- Lightly tap foundation/concealer around the lip line, then set that area with a touch of powder.
- If feathering is your main issue, prioritize a waxier liner over extra concealer.
According to the American Academy of Dermatology Association, petroleum jelly and fragrance-free balms can help relieve chapped lips, but if you get frequent cracking, consider asking a dermatologist about irritants or lip-licking habits.
Layering methods that actually hold up (choose one)
You do not need every trick at once. Pick the method that matches your formula and tolerance for matte feel.
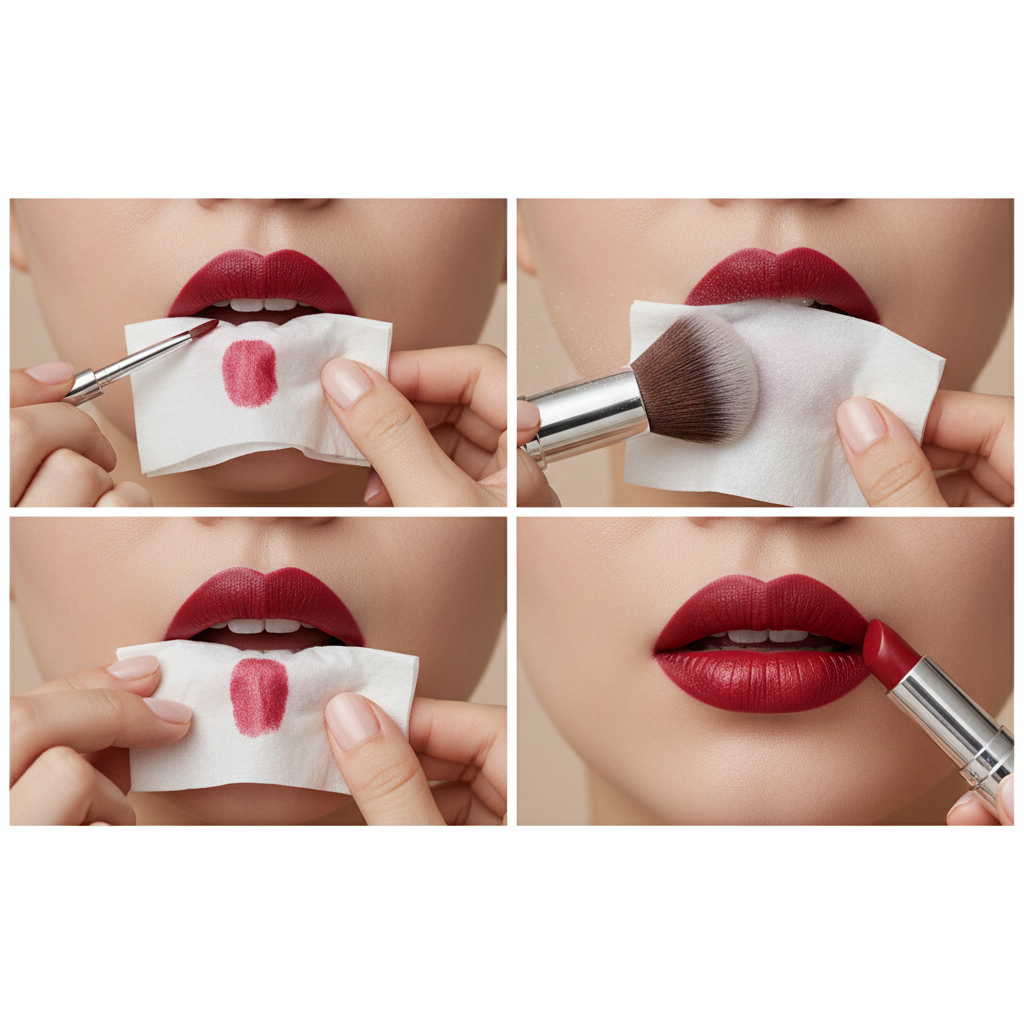
Method A: bullet lipstick + blot + reapply (the most forgiving)
- Apply a thin first coat, press lips together gently.
- Blot with tissue, then add a second thin coat.
- For more structure, fill lips with liner first, then add lipstick on top.
Method B: “powder sandwich” for transfer reduction
- Apply lipstick once.
- Place a single layer of tissue over lips and dust translucent powder lightly through the tissue.
- Add a final thin coat of lipstick to bring color back.
Method C: stain + lipstick for the inner-rim fade
- Apply a lip stain (or long-wear tint) and let it set fully.
- Add a comfortable lipstick on top, focusing on the outer two-thirds.
- After meals, you often only need a quick top coat because the stain stays put.
Key point: thin layers outperform thick ones, especially if you talk a lot or drink coffee throughout the day.
Liner and edge control: the difference between “worn” and “messy”
If you like bold colors, edge control is half the battle. This is where many “all day” claims quietly fail in real life.
- Use a slightly deeper liner than your lipstick for structure, then blend it inward so it doesn’t look harsh.
- Fill the whole lip with liner when you need longevity, it gives pigment something grippy to hold on to.
- Clean edges with a small brush and a tiny amount of concealer, then set that perimeter with powder.
- If corners crack first, tap a micro-dot of balm only at the corners, then blot, then reline just that area.
How to make lipstick last all day for events often comes down to this: keep the edge crisp, and a fade reads intentional instead of smeared.
Formula cheat sheet: pick the right lipstick for your day
Not every formula is meant to survive the same routine. Here’s a practical way to decide without overthinking.
| Formula type | Best for | Typical weak spot | Make it last longer |
|---|---|---|---|
| Matte bullet | All-day office wear, photos | Dryness, cracking | Blot after balm, apply in thin layers, tiny powder set |
| Satin/cream bullet | Comfort, quick reapply | Transfer, edge blur | Liner + blot + second coat, avoid heavy balm |
| Liquid matte | Maximum transfer resistance | Uneven wear, inner rim fade | Prep well, apply very thin, don’t rub lips while drying |
| Lip stain/tint | Meals, long days, natural look | Can look dry or too sheer | Layer with balm or lipstick top coat after it sets |
| Gloss | Plump look, comfort | Short wear time | Use over stain, reapply only gloss as needed |
If you’re torn between comfort and longevity, pairing a stain with a comfortable top coat is often the least annoying compromise.
Real-world touch-up plan: what to do after coffee, lunch, and a long meeting
Even when you learn how to make lipstick last all day, most people still need a small reset after meals. The goal is a fast refresh that doesn’t cake up.
After coffee or water
- Check only the inner rim and corners.
- Tap on a tiny amount of color with a fingertip, then blot once.
After lunch (the most destructive moment)
- Blot oils gently, don’t rub.
- If edges moved, re-outline corners with liner, then add a thin coat.
- If you wore a stain base, you may only need a quick top layer.
Before a photo or meeting
- Focus on symmetry: cupid’s bow, corners, and center.
- One thin coat beats repeated swipes that build texture.
Mini kit that actually helps: liner, your lipstick (or a small decant), a few tissues, and a compact mirror. Powder is optional unless transfer is your main issue.
Mistakes that sabotage wear (even with “long-lasting” products)
- Applying balm right before lipstick: comfort improves, staying power drops. Give balm time, then blot.
- Skipping dry time: many long-wear formulas need a minute to set. Talking or rubbing lips too soon breaks the film.
- Over-powdering: can make lipstick look dull and emphasize lines. Use a light hand, and only if you need it.
- Using the wrong remover at night: harsh scrubbing can irritate lips, then next-day lipstick looks worse. Choose a gentle remover and moisturize after.
If you get persistent burning, swelling, or peeling around the lips, it could be irritation or allergy. In that case it’s safer to stop the product and consider asking a dermatologist for guidance.
Conclusion: a simple routine you can repeat
If you want a reliable baseline, keep it simple: smooth lips, light hydration, blot, line, apply thin layers, then set only if your day needs it. Most “all day” results come from technique more than buying a new tube.
Try this tomorrow: do the blot + two thin coats method, then decide if you need liner or powder based on how it fades by mid-day. Small tweaks beat a full routine you’ll quit after a week.